
Wall Prep Checklist for Wallpaper: Complete Guide
August 10, 2025
July 20, 2025
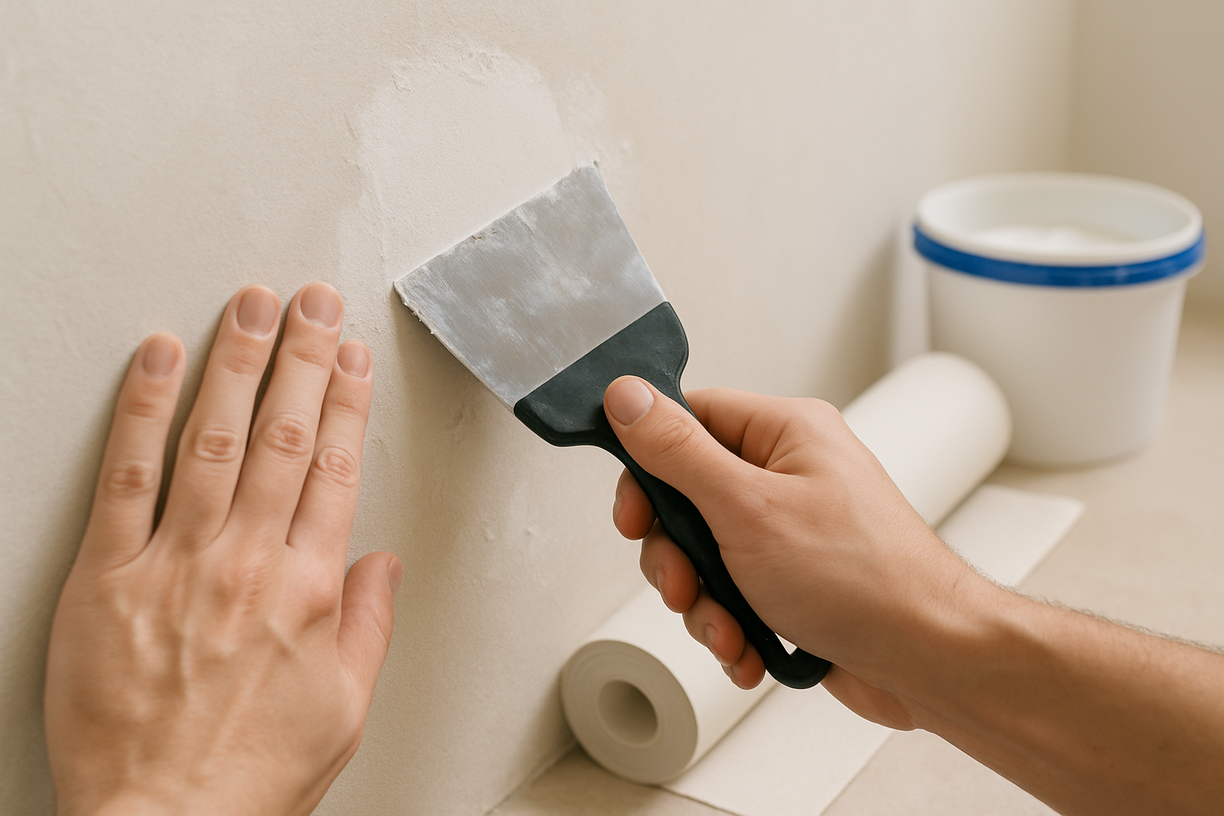
Installing wallpaper can transform any room, but the difference between a professional-looking result and a disappointing failure often comes down to one critical factor: wall preparation. Whether you’re a DIY enthusiast tackling your first wallpaper project or a seasoned renovator, following a comprehensive wall prep checklist ensures your wallpaper will look stunning and last for years to come.
Proper wall preparation isn’t just recommended—it’s essential. Without adequate prep work, even the highest-quality wallpaper can bubble, peel, or fail prematurely. This guide provides everything you need to know about preparing walls for wallpaper installation, from initial assessment to final quality control.
Why Proper Wall Preparation is Critical for Wallpaper Success
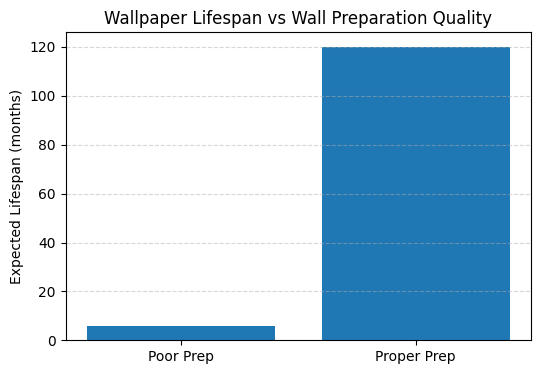
The statistics tell a sobering story: approximately 80% of wallpaper failures can be traced back to inadequate wall preparation. When walls aren’t properly cleaned, primed, or repaired before installation, wallpaper adhesive struggles to bond effectively, leading to premature peeling, bubbling, and costly re-installation.
Professional wallpaper installers understand that preparation accounts for roughly 60-70% of the total installation time—and for good reason. A wall that’s been meticulously prepared provides the ideal surface for wallpaper adhesive to create a lasting bond. Conversely, cutting corners during preparation can result in wallpaper failure within months rather than the expected 10-15 year lifespan.
The cost difference between doing it right the first time versus dealing with premature failure is substantial. While proper preparation might add 1-2 days to your project timeline, wallpaper removal and re-installation can cost 3-4 times the original project budget, not including the time and frustration involved.
Poor preparation affects more than just adhesion. Inadequately prepared walls can cause visible imperfections to telegraph through the wallpaper, creating an uneven, unprofessional appearance. Dirt, grease, or residue left on walls can also cause discoloration over time, permanently staining your investment.
Essential Tools and Materials for Wall Preparation
Must-Have Tools for Every Wall Type
Success in wall preparation starts with having the right tools. Professional-grade tools not only make the job easier but also ensure more consistent results. Here’s what you’ll need for virtually any wall preparation project:
Surface preparation tools form the foundation of your toolkit. A high-quality putty knife set (2-inch, 4-inch, and 6-inch) handles everything from small crack repairs to large-scale skim coating. A flexible sanding block with 120-grit and 220-grit sandpaper smooths repairs and lightly abrades glossy surfaces for better primer adhesion.
Cleaning equipment ensures surfaces are spotless before primer application. Microfiber cloths provide lint-free cleaning, while a quality degreasing sponge removes stubborn residue. Don’t overlook the importance of a vacuum with brush attachment for removing dust from cracks and crevices.
Measurement and marking tools help maintain accuracy throughout the process. A 25-foot tape measure, 4-foot level, and pencil for light marking ensure your preparation work sets up perfect wallpaper alignment later.
| Tool Category | Essential Items | Approximate Cost |
| Surface Prep | Putty knife set (3 sizes), sanding block, scrapers | $35-50 |
| Cleaning | Microfiber cloths, degreasing sponge, bucket | $15-25 |
| Repair | Spackling compound, mesh tape, caulk gun | $20-35 |
| Application | Primer brush, roller, paint tray | $25-40 |
| Total Investment | $95-150 |
Materials You’ll Need Based on Wall Condition
The specific materials required depend heavily on your wall’s current condition, but certain items appear on virtually every preparation project. Understanding when and why to use each material ensures you purchase exactly what you need without overspending on unnecessary products.
Primers and sealers create the crucial bonding surface between your wall and wallpaper adhesive. Alkyd-based primers work best on previously painted surfaces, while acrylic primers excel on new drywall. For walls with stains or strong odors, consider a specialized blocking primer that prevents bleed-through.
Fillers and repair compounds address imperfections that would otherwise telegraph through finished wallpaper. Lightweight spackling compound handles small holes and cracks, while setting-type joint compound provides superior strength for larger repairs. For areas prone to movement, flexible acrylic caulk prevents future crack development.
Cleaning solutions remove contaminants that interfere with adhesion. Tri-sodium phosphate (TSP) cuts through grease and grime on kitchen or bathroom walls, while a mild detergent solution suffices for most living areas. Always choose solutions compatible with your wall material to avoid damage.
| Primer type | Base | Best use |
|---|---|---|
| Alkyd (oil‑based) | Oil | New drywall; seals porous paper and prevents moisture penetration |
| Acrylic (water‑based) | Water | Previously painted drywall; promotes adhesion for new wallpaper |
| Blocking primers (e.g., Zinsser Cover Stain, BIN) | Oil or shellac | Walls with stains, smoke or odours; prevents bleed‑through |
| Clear sealer (Zinsser Gardz) | Water | Repairs damaged drywall, seals chalky surfaces before primer |
Step-by-Step Wall Preparation Process
Phase 1 – Initial Assessment and Planning
Every successful wallpaper project begins with thorough assessment and planning. This phase determines your material needs, identifies potential challenges, and establishes a realistic timeline for completion.
Start by examining your walls under bright lighting, preferably during daylight hours. Look for obvious damage like holes, cracks, or loose paint, but don’t stop there. Run your hand along the wall surface to detect subtle imperfections that might not be immediately visible. Pay special attention to corners, baseboards, and ceiling lines where previous work might have left irregularities.
Document your findings room by room, noting the type and extent of each issue. Take photos of problem areas—they’ll help when consulting with professionals or shopping for repair materials. This documentation also serves as a quality control reference during the preparation process.
Measure your walls accurately, calculating both total square footage and individual wall dimensions. Add 10% to your material calculations to account for waste and touch-ups. This planning phase also helps you determine realistic timing—most wall preparation requires 2-3 days for proper drying between steps.
Phase 2 – Surface Cleaning and Preparation
Thorough cleaning removes contaminants that prevent proper primer and adhesive bonding. Even walls that appear clean often harbor invisible films of dust, grease, or residue that compromise wallpaper installation.
Begin with basic dust removal using a vacuum with brush attachment, working from top to bottom to avoid re-contaminating cleaned areas. Pay special attention to textured surfaces where dust accumulates in crevices. Follow vacuuming with a light sanding using 220-grit sandpaper to create microscopic texture that improves primer adhesion.
For walls requiring deeper cleaning, choose your cleaning solution based on the type of contamination present. Kitchen walls typically need degreasing with TSP solution, while bathroom walls might require mildew treatment before proceeding. Always test cleaning solutions in an inconspicuous area first to ensure they won’t damage your wall surface.
When removing existing wallpaper, patience prevents wall damage that creates additional repair work. Score the wallpaper surface lightly, then apply removal solution according to manufacturer directions. Allow adequate penetration time before attempting removal—rushing this step often results in gouged drywall that requires extensive repair.
Phase 3 – Repair and Smoothing
Surface repairs form the foundation for professional-looking wallpaper installation. Even minor imperfections become magnified under wallpaper, so thorough repair work at this stage prevents disappointment later.
Small holes and cracks require different approaches based on their size and location. Holes smaller than a nail head can be filled directly with spackling compound, while larger holes need backing material for proper support. Use mesh tape for cracks longer than 6 inches to prevent future movement from reopening the repair.
Apply filler materials in thin layers, allowing each to dry completely before adding the next. Overfilling repairs and sanding back to level produces better results than attempting to achieve perfect coverage in a single application. Pay attention to feathering edges—abrupt transitions between repair material and existing wall surface will show through wallpaper.
Textured surfaces present special challenges for wallpaper installation. Light texture can often be smoothed with careful skim coating, but heavy texture like popcorn ceilings or pronounced orange peel requires complete removal or professional smoothing. Consider the time and effort involved against hiring a professional for extensive texture work.
Phase 4 – Priming and Final Preparation
Priming creates the optimal surface for wallpaper adhesive bonding while providing insurance against future removal damage. Many DIYers are tempted to skip this step, but proper priming is essential for long-term wallpaper success.
Choose primer based on your specific wall condition. New drywall requires a high-build primer that seals the porous surface and provides uniform porosity for consistent adhesive absorption. Previously painted walls need primer that promotes adhesion between existing paint and wallpaper adhesive. For walls with stains or strong odors, use a blocking primer that prevents bleed-through.
Apply primer using the same techniques you’d use for paint application, maintaining consistent coverage without drips or missed spots. Use a high-quality synthetic brush for cutting in around trim and corners, followed by a 3/8-inch nap roller for field areas. Work in manageable sections to maintain a wet edge and avoid lap marks.
Pay special attention to areas where different materials meet—joint compound, wood trim, and existing paint all absorb primer differently. Apply a second primer coat to areas that appear to absorb the first coat completely, ensuring uniform surface preparation throughout.