
How to Wallpaper Around Corners: Step-by-Step Guide
August 10, 2025
August 10, 2025
Alright, let’s cut to the chase. You’ve been cruising through your wallpapering project like a champ, feeling all Bob Vila-ish, and then BAM – you hit your first corner and suddenly everything goes sideways faster than a Windows ME installation.
Here’s the deal: corners are where dreams go to die in the wallpapering world. But they don’t have to be. With the right approach, tools, and techniques, you can nail corners like a pro and avoid looking like you wallpapered with oven mitts on.
This guide isn’t going to sugarcoat it or give you participation trophies. We’re going deep into the trenches of corner wallpapering – the good, the bad, and the “why-did-I-think-this-was-a-good-idea” moments.
Reader Analysis: What You’re Really Looking For
Look, I get it. You didn’t wake up this morning thinking “Gee, I’d love to learn about the quantum physics of wallpaper corners.” But here we are, and I’m going to make this as painless as possible while giving you the real-world techniques that actually work.
Essential Tools and Materials for Corner Wallpapering
First rule of corner wallpapering: you can’t fix stupid, but you can prevent it with the right tools.
Don’t even think about tackling corners with that crusty old utility knife you found in your junk drawer. Professional results require professional tools – or at least tools that were made this decade.
Must-Have Tools
The absolute non-negotiables:
- Smoothing brush or plastic smoother – Your wallpaper whisperer
- Sharp utility knife with fresh blades – Emphasis on fresh. That blade you used to open Amazon boxes? Not cutting it (literally)
- Seam roller – For making edges stick like they actually want to be there
- Measuring tape and pencil – Because “eyeballing it” is how we ended up needing this guide
Pro Tip: “A dull blade is more dangerous than a sharp one – it’ll tear your wallpaper and your patience.” – Every contractor who’s learned this the hard way.
Specialized Corner Tools
These aren’t just fancy gadgets designed to empty your wallet:
- Corner smoothing tool – Think of it as a spatula specifically designed for wallpaper gymnastics
- Trimming guide – Your insurance policy against wobbly, amateur-hour cuts
- Small detail brush – For getting adhesive into those tight spots where your big brush fears to tread
Adhesive and Preparation Materials
Here’s where people get cheap and regret it later. Quality adhesive is like a good foundation – invisible when done right, obvious when done wrong.
| Wallpaper Type | Recommended Adhesive | Coverage per Gallon | Working Time |
| Vinyl | Heavy-duty vinyl adhesive | 200-250 sq ft | 15-20 minutes |
| Paper-backed | Standard wallpaper paste | 300-350 sq ft | 10-15 minutes |
| Fabric | Specialty textile adhesive | 150-200 sq ft | 20-30 minutes |
| Grasscloth | Natural fibre paste | 200-250 sq ft | 25-35 minutes |
Quality sources: Roman Decorating Products and Zinsser make adhesives that won’t quit on you when the going gets tough.
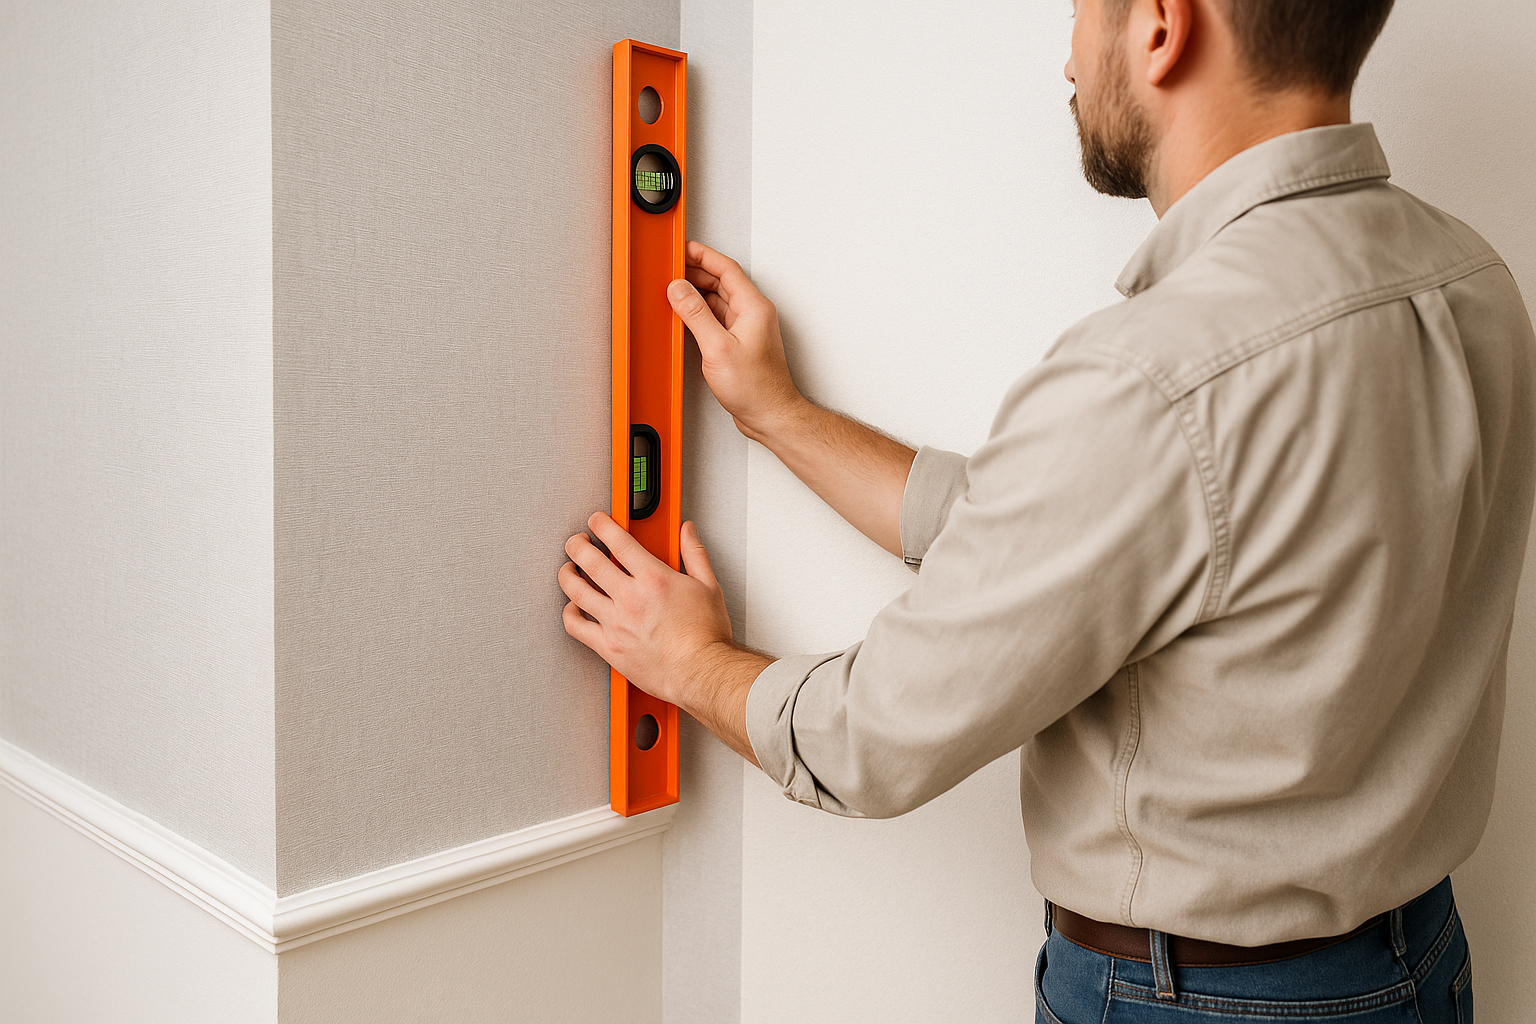
Understanding Different Types of Corners
Not all corners are created equal. It’s like comparing a gentle merge onto the highway to a hairpin turn in the mountains – technically the same concept, completely different execution.
Inside Corners (Concave)
These are your training wheels corners – the ones that tuck inward where two walls meet, like the corner of your living room.
Why inside corners are your friend:
- Gravity actually helps instead of fighting you
- Mistakes are more forgivable
- Less stress on the wallpaper material
- You can hide minor imperfections easier
Think of inside corners as the “Hello World” of wallpapering. Master these first, build your confidence, then tackle the boss battles.
Outside Corners (Convex)
Here’s where the rubber meets the road. Outside corners stick out like a sore thumb – window frames, built-in shelving, architectural details that looked great in the design phase.
The reality check: You’re asking wallpaper to perform Olympic-level gymnastics around a 90-degree bend without tearing, bunching, or looking like it was installed by someone wearing oven mitts.
Key insight: Outside corners require surgical precision and zero tolerance for “close enough.”
Irregular Corners and Obstacles
Welcome to the real world, where corners are about as perfectly square as a circle and pipes appear out of nowhere like they’re playing hide-and-seek.
Common curveballs:
- Corners that are “close enough” to 90 degrees (thanks, 1970s construction)
- Pipes sneaking around corners at the worst possible moment
- Electrical outlets playing peek-a-boo
- Crown moulding that’s “level” in the same way that I’m “tall”
Fun Fact: According to the Canadian Home Builders’ Association, fewer than 30% of residential corners are actually square. Plan accordingly and lower your expectations of your house’s geometry.